We've got a secret. A new obsession. A slight addiction to folding Japanese paper dolls.
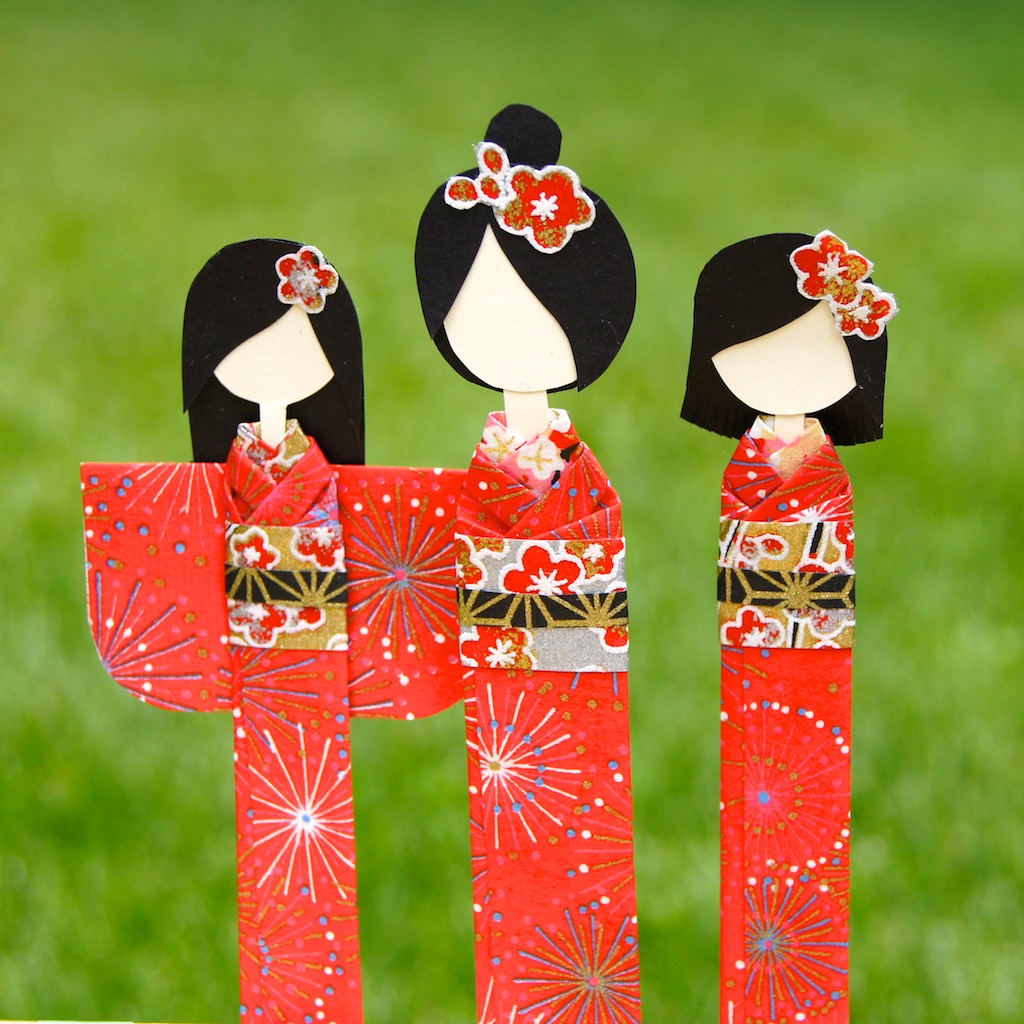
These paper dollies, our take on Japanese shiori ningyo (bookmark dolls), are rather addictive once you get started. Just some scraps of chiyogami, a few clever folds, a dab or two of glue, and a little bit of fancy scissorwork, and suddenly you've got a bevy of beauties on your hands.
While these paper dolls would make lovely bookmarks, we also envision them on cards, in frames, adorning gifts. A perfect way to use
Omiyage's selection of
chiyogami,
katazome and
aizome!
And for you? A little tutorial on how to make 6 lovely little dollies out of little more than 3 pieces of our 5x7" washi papers.
3 dollies with fashionable sleeves.
Approx finished size 2 1/2" x 4 1/2 " (6.5 x 11.5cm)
3 dollies without.
Approx finished size 1 1/2" x 4 1/2 " (4 x 11.5cm)
(Of course, these dollies are designed to look as good from the back as they do from the front. If you'll be sticking them down, you'll be able to make 6 one-sided paper dolls with sleeves.)
1. You will need 3 pieces of 5x7" chiyogami paper, white or cream card stock, black card stock, craft glue. We've selected 3 pieces of chiyogami you might find in our 5x7" Washi Variety Pack.
2. Cut each piece of chiyogami as shown below:
For each piece of 5x7" chiyogami, you will have 10 pieces that look like this:
3. For each doll, gather your selection for kimono/sleeves, collar, obi (wide belt), obijime (belt tie), card stock, scissors and glue.
4. From the cream card stock, cut a long strip for the doll body. Piece should be approximately 1/8" (3mm) wide x 5" (125mm) long.
5. Collar: fold paper for collar in half. Crease well. Wrap around body and fold left side down. Always ensure you fold left side (facing you) first. (The opposite is only ever used for dressing the deceased.) Fold right side down. Secure with glue. Trim excess paper.
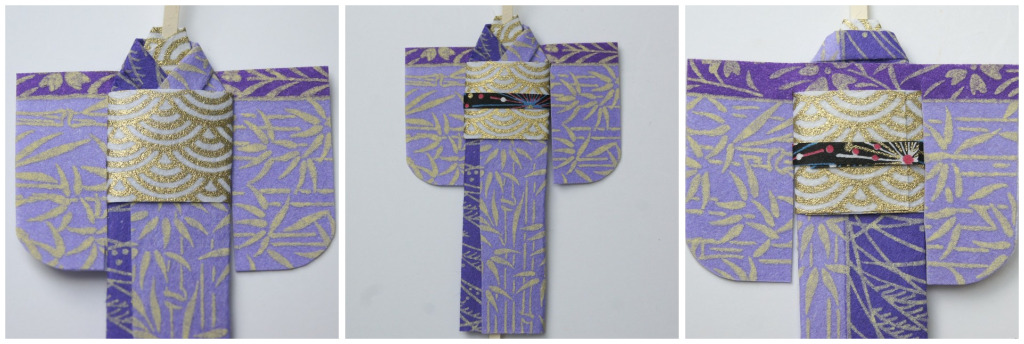
6. Kimono: With the paper laying downwards on your working surface, fold down approximately 1/2" (10mm) of narrow edge. Crease well. Turn paper over and fold down approximately 1/4" (5mm) to form kimono collar.
Place body with collar in the centre of the kimono fabric. Fold left side of kimono paper over, lining up with collar. Crease only top of the fold.
Fold side in to create a straight line from bottom of kimono to newly folded kimono collar, as seen in images below.
Repeat with right side. Try to ensure angles are the same. The right side should leave a small strip of the left uncovered as seen below.
7. If not adding sleeves, proceed to step 8. If adding sleeves, glue the sleeve pieces together. Fold in half and round bottom corner with scissors. Unfold, hold against back of doll and carefully cut a slit into sleeve paper on either side of the kimono. Cut sleeves into shape shown in middle image below. Glue onto back of kimono just below kimono collar.
8. Wrap obi (wide belt) around doll, covering angled ends of kimono paper. Glue to secure. Trim excess paper. Wrap obijime (belt tie) around obi. Secure with glue. Trim excess paper.
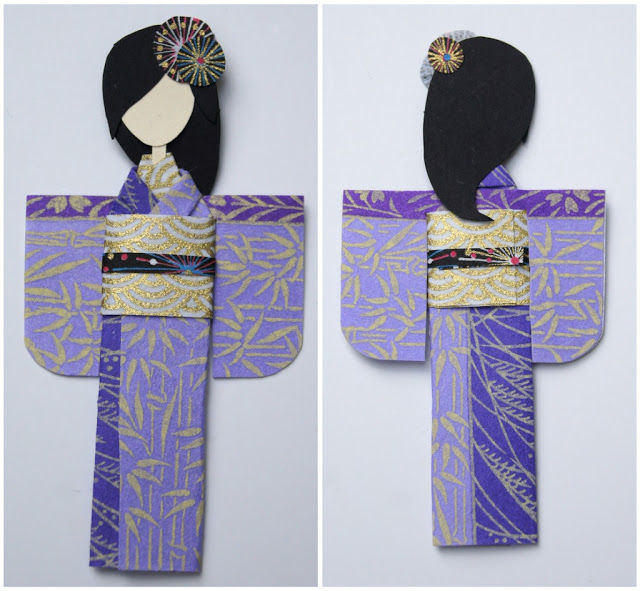
9. Now that the basic form for the doll has been created, it's time to bring your doll to life with a little personality! Cut a face from the cream card stock - experiment with round, oval or almond shaped faces for different looks.
10. Attach the face to the black card stock with a small dab of glue - don't glue down completely, you will need to get in between the face and the hair to attach to neck later. Cut around the head to create the back of your hair style. We have found that longer or mid-length, straight hair cuts give your doll a very young look, while creating an updo will give your doll a more sophisticated air. We're into this "swoosh" of hair, for a bit of added interest. Take a second piece of card stock and use this to create bangs. (Either trace around hair shape and then cut out, or simply hold the second piece of black card to the first and carefully cut into shape to get the top shape of hair - creation of bangs is all up to you!) We've styled our dolls with long sideswept bangs. Ponytails and buns can be sandwiched between the front and back hair pieces.

11. Glue the head to the body by adding glue to the neck and sandwiching between face and back hair piece. If the neck is too long, trim before gluing. Also trim extra body that may be sticking out from bottom of kimono. Accessorize with flowers cut from chiyogami scraps for a lovely final touch.
There she is - as lovely from the back as she is from the front! We dare you to fold just one!


.jpg)
.jpg)
.jpg)
.jpg)
.jpg)
.jpg)
.jpg)
.jpg)


 February 14, in many countries around the world celebrated Valentine's Day or Valentine's Day . It is believed that Valentine's Day has been around for more than 16 centuries, but the festival of love known to still earlier times - from the time of ancient pagan cultures. For example, in mid-February the Romans celebrated the festival of eroticism, called Lupercalia, in honor of the goddess of love Juno Februata. At the festival, there are specific "culprit" - Christian priest Valentine. This story dates back to around 269 a year, while the rules of the Roman Empire Emperor Claudius II. Belligerent Roman army experienced an acute shortage of soldiers for military campaigns and military commander was convinced that the main enemy of his "Napoleonic" plans - marriage, for married legionnaire of the glory of the empire thinks much less than that, as a family to feed. And, in order to save his soldiers fighting spirit, the emperor issued a decree banning the legionaries to marry.
 But fall in love with some of the soldiers do not become less. And their happiness was a man who, not fearing the wrath of the emperor, began to secretly marry foreign players with their loved ones. Them was a priest named Valentine of Terni Roman city (Valentine of Terni). Apparently, he was a true romantic, as his favorite entertainment was to reconcile quarreling, helping to write love letters and give the request of Legionnaires color of an object of their passion. It's clear as soon as the emperor learned of this, he decided to "criminal activity" to stop. Valentine was sentenced to death. The tragedy of the situation was still in the fact that he and Valentine was in love with the jailer's daughter. The day before his execution, the priest wrote a farewell letter to the girl, where he spoke about his love and signed it "Your Valentine." Read it was already after he was executed. Subsequently, as a Christian martyr who suffered for their faith, Valentine was canonized by the Catholic Church. And in 496 the Pope Gelasius (Pope Gelasius I) announced on February 14 Valentine's Day. Since 1969, The reform of worship Saint Valentine was removed from the liturgical calendar of the Catholic Church (along with other Roman saints information about the life of which are contradictory and unreliable). However, until 1969, and the church does not endorse or support the tradition of celebrating this day.
 So whether it was anyway, but, apparently, it was the custom to write out on Valentine's Day love notes - "Valentine". And in this festival like to arrange a wedding and get married. It is believed that this will be the key to eternal love. In Western Europe, Valentine's Day has become a widely celebrated since the 13th century, in the United States - since 1777. The tradition to give gifts on this day grew stronger with each passing year, and for some has become quite a successful business. For example, at the beginning of the last century, Americans have been taken to send their brides marzipan, which were quite expensive. In Japan, the tradition of giving on this day there was sweet with the filing of a large company for the production of chocolate. There began to celebrate Valentine's Day in 30 years, and still remains the most popular chocolate gift. By the way, there's Valentine's Day is slightly reminiscent of "March 8 for men", as Japanese men get, perhaps, even more gifts than women: men's accessories such as razors, lotion, wallet and so on.
 In a passionate French as Valentine's Day decided to give jewelry, and in romantic Denmark people send each other dried white flowers. In Britain, unmarried girls stand on February 14 before sunrise, are near the window and look at passing men. According to legend, the first man, whom they see, and there betrothed. But there is in the world, some countries are particularly distinguished themselves in the celebration of Valentine's Day. The first is Saudi Arabia , which is the only country in the world where this holiday ... officially banned, and, under penalty of heavy fines. And in Russia was a lovers' holiday, so only he notes not in the winter, and in the early summer. He was associated with the legendary love story of Peter and Fevronia and dedicated Kupala-Slavic pagan god Perun son.